

I love these salt dough beach shell keepsakes, they are easy and cheap to make and a perfect way to use up all the shells and assortments that come home in children’s pockets after a beach trip.
Why Beach Shell Keepsakes
Last summer we spent a lot of time at the beach with the kids. On our last trip, we ended up with loads of shells, stones, driftwood and sand. We had buckets and bags full not to mention the few extra that I found hidden in the girl’s pockets when it came to washing their clothes.
The big question was what to do with all this beach memorabilia?
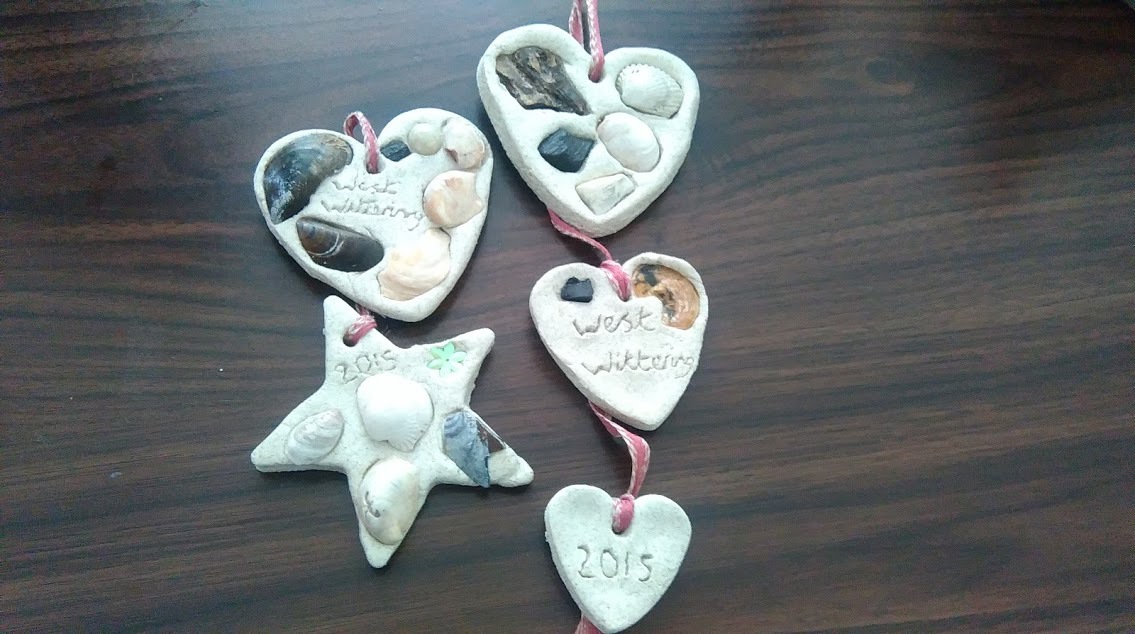
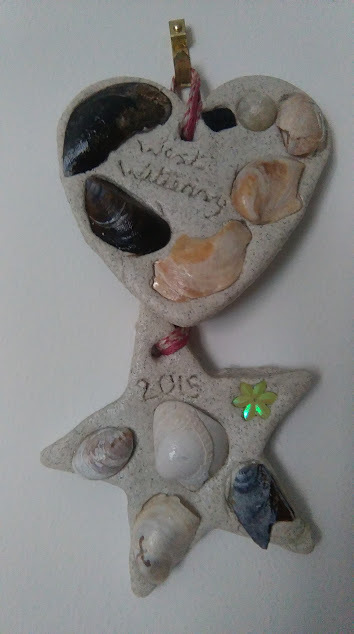
That’s when I saw a post about using salt dough shapes then adding shells to them. This was a great idea but I didn’t just want them lying around so I decided that we would make them into hanging decorations and fridge magnets as keepsakes to remember our day at the beach.
The kids went through their hull of shells and stones and picked out the best ones that they wanted to use. We then made a batch of salt dough and to make it more authentic I added the sand that was in the bottom of the bucket to the salt dough mixture. This gave it a great look and texture. I already had some craft ribbon that I picked up from our local craft store and I found some cheap small magnets on Amazon.
How to make Salt Dough Beach Shell Keepsakes
What you need
1 Cup of Table Salt
1 Cup of Plain Flour
Water
Cookie Cutters
Beach Shells
Optional –
A small amount of Sand from the beach
Craft Magnets
Ribbon
Method
Step 1. Take a trip to the beach and get collecting.
Step 2. Sort through your collection and pick out the items you want to use then give them a good wash.
Step 3. Make your salt dough. How to make Salt Dough – One a cup of flour, half a cup of salt and half a cup of water combine these all together and mix. I then added some of the leftover sand from the bucket to give the dough more of a beach feel. Then knead the mixture together until you have a dough.
Step 4. Roll out your salt dough out to about a cm thick and using a cookie cutter cut your dough into shapes.
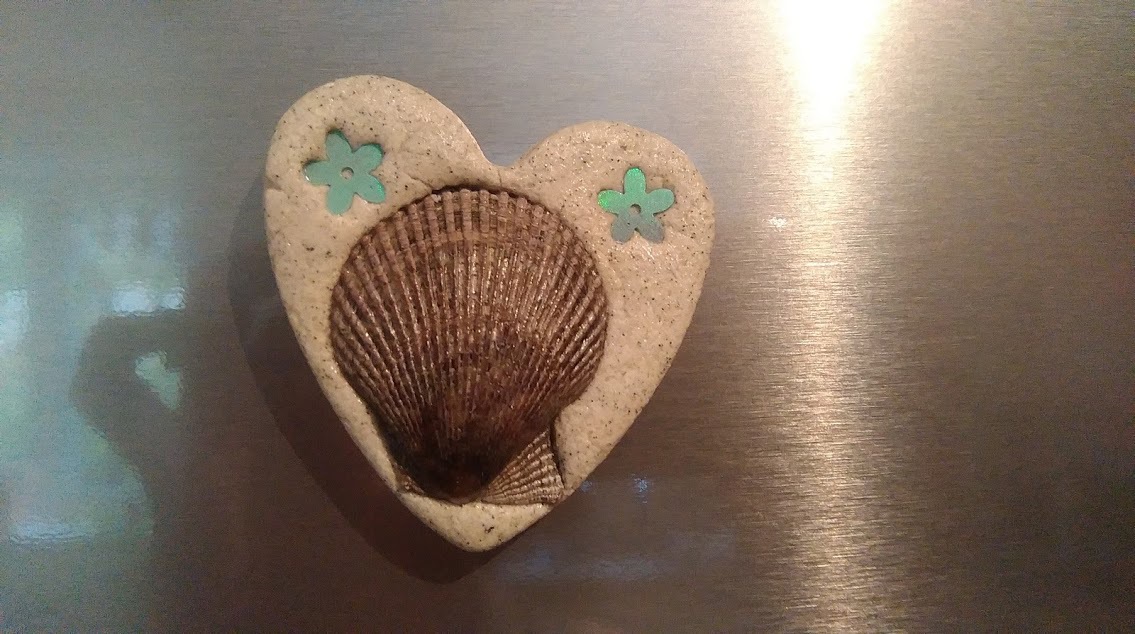
Step 5. If you want them to hang make a hole in the top or if they are for the fridge, gently push the magnet into the back so half of the magnet is still sticking out.
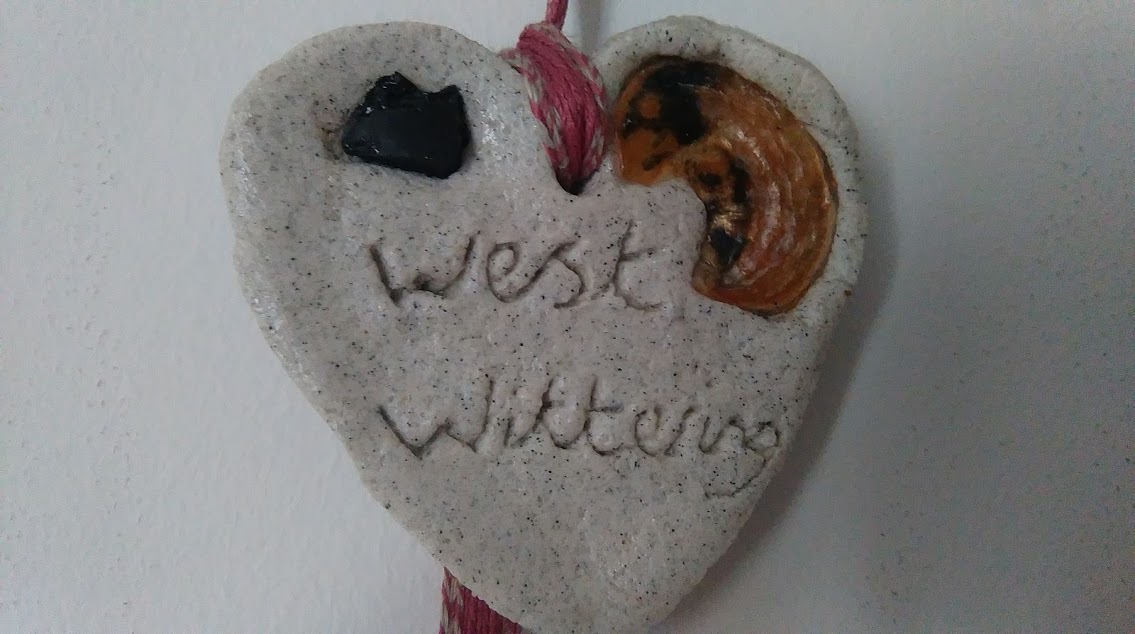
Step 6. Add your shells and anything else that you have collected to your salt dough. To add to the keepsake I wrote the beach name and the year we went. I did this with a cocktail stick doing little dots next to each other in the shape of the words then gently pushing the dots together to form the letters alternatively you could use letter stamps or just wait for it to dry and write on your salt dough keepsake with a sharpie.
Step 7. Let your salt dough air dry, we left ours over night.
Step 8. I then went over them all with Mod Podge to seal them and give them a nice glazed look. Then leave them to dry.
Some of my posts contain affiliated links to products where I may receive a small fee if these products are bought.
The fridge magnet salt dough beach shells, I found didn’t hold very well so I added a small bit of super glue then put the magnet back in the hole. For the hanging ones, I tied together with the craft ribbon.
Step 9. Hang up and enjoy.
Subscribe to our newsletter!
If you enjoyed reading my post why not take a look at my other post –
Window Sticker Activity for Children
Children’s Halloween Craft Ideas
Rainy Day Children’s Crafts and Activities
- Hetty the Hedgehog and the Mexican Jungle
 Hetty the Hedgehog and the Mexican Jungle is the second book in the Hetty the …
 - Hetty the Hedgehog and the Animal Snatchers
 When animal snatchers take her friends, Hetty is the only one left to save them.She …
 - Children’s Short Story – Tim the Blue Whales Journey
 Tim the Blue Whales Journey Tim, the blue whale, set off across the ocean, With …
Children’s Short Story – Tim the Blue Whales Journey Read More »
- Children’s Short Story – Stay Away From the Woods
 Below is a children’s short story I wrote. The inspiration came from an illustration of …
Children’s Short Story – Stay Away From the Woods Read More »
- Children’s Short Story- The Halloween Snowmen and The Evil Snowwomen
 Below is a children’s short story I wrote after I read in the newspaper it …
Children’s Short Story- The Halloween Snowmen and The Evil Snowwomen Read More »
- Children’s Short Story – Fred the Little Monster
 Below is a children’s short story I wrote about a little monster who tries to …
Children’s Short Story – Fred the Little Monster Read More »